
Creating a no commercial yeast starter is a rewarding and fascinating process that allows you to cultivate natural wild yeast from the environment. This method has been used for centuries and results in a unique and flavorful starter that can be used in a variety of baked goods.
The ingredients for this recipe are simple and likely already in your pantry. However, if you don't have whole wheat flour, you will need to pick some up at the supermarket. Whole wheat flour is essential because it contains more nutrients and wild yeast compared to refined flours, which helps in the fermentation process.
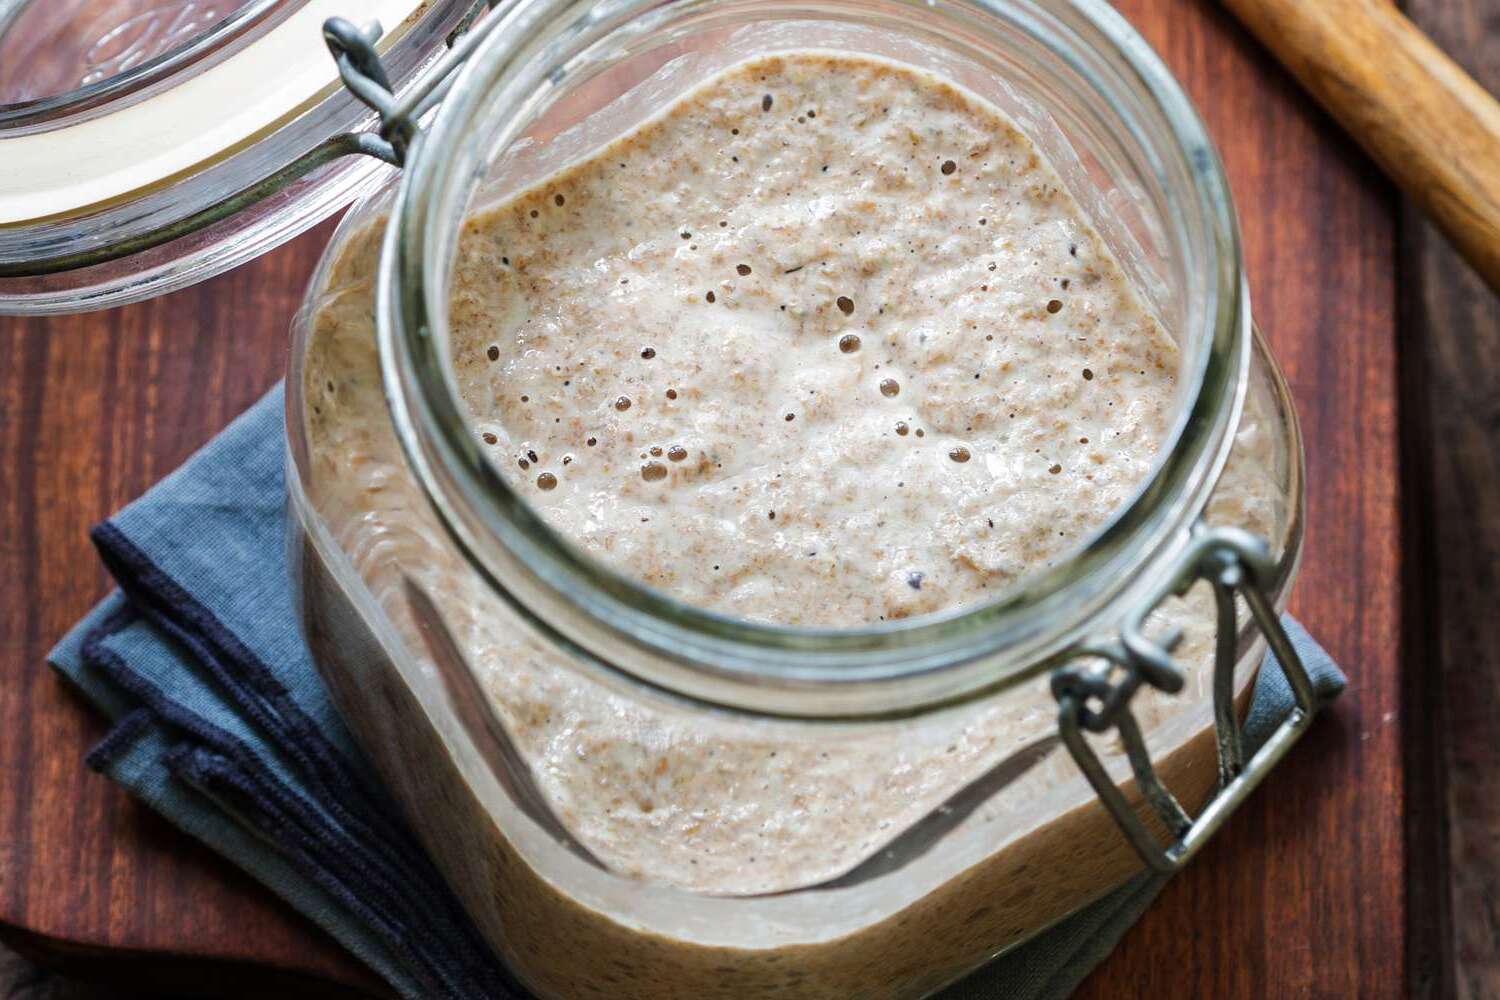
Ingredients For No Commercial Yeast Starter Recipe
Whole wheat flour: This type of flour is made from the entire grain of wheat, including the bran, germ, and endosperm. It is rich in nutrients and natural yeast, which are crucial for starting the fermentation process.
Water: Room temperature water is used to create the right environment for the yeast to thrive. It should be free of chlorine and other chemicals that could inhibit yeast growth.
Technique Tip for This Recipe
When feeding your starter, use filtered water to avoid any chemicals that might inhibit the growth of natural yeast. Additionally, ensure your jar is large enough to accommodate the expanding mixture, as the starter will grow in volume as it ferments.
Suggested Side Dishes
Alternative Ingredients
whole wheat flour - Substitute with rye flour: Rye flour has a similar nutrient profile and can help in the fermentation process due to its natural yeast content.
whole wheat flour - Substitute with spelt flour: Spelt flour has a slightly nutty flavor and can also support the growth of natural yeast.
room temperature water - Substitute with filtered water: Filtered water ensures that no chlorine or other chemicals inhibit the growth of natural yeast.
room temperature water - Substitute with spring water: Spring water is free from additives and minerals that might affect the fermentation process.
Other Alternative Recipes Similar to This
How to Store or Freeze This Recipe
- To store your starter in the refrigerator, transfer it to a clean glass jar with a loose-fitting lid. This will slow down the fermentation process, allowing you to feed it less frequently.
- Feed your refrigerated starter once a week. Discard half and replenish with 1 cup of whole wheat flour and 1 cup of water. Stir well and return it to the fridge.
- If you plan to bake frequently, keep your starter at room temperature and feed it daily. This keeps it active and ready for use.
- For long-term storage, freeze your starter. First, feed it as usual, then let it sit at room temperature for a few hours to become active. Transfer it to a freezer-safe container, leaving some space for expansion.
- When you’re ready to use your frozen starter, thaw it in the refrigerator overnight. Once thawed, bring it to room temperature and feed it with 1 cup of whole wheat flour and 1 cup of water. Let it sit until bubbly and active before using.
- If you notice any off smells or mold, discard the starter and begin a new batch. Proper feeding and storage are key to maintaining a healthy starter.
How to Reheat Leftovers
Preheat your oven to 350°F (175°C). Place the bread on a baking sheet and cover it with aluminum foil to prevent it from drying out. Heat for about 10-15 minutes, or until warmed through.
For a quick reheat, use a microwave. Place the bread on a microwave-safe plate and cover it with a damp paper towel. Microwave on medium power for 20-30 seconds. Check and repeat if necessary, but be cautious not to overheat and dry it out.
If you have a toaster oven, preheat it to 350°F (175°C). Wrap the bread in aluminum foil and place it in the toaster oven. Heat for 10-15 minutes, checking occasionally to ensure it doesn’t get too crispy.
For a stovetop method, heat a skillet over medium-low heat. Place the bread in the skillet and cover it with a lid. Heat for about 2-3 minutes on each side, or until warmed through.
To add a bit of moisture and flavor, lightly brush the bread with olive oil or butter before reheating using any of the above methods. This will help keep it from drying out and add a delicious touch.
Best Tools for This Recipe
Glass jar: A clear container that allows you to monitor the progress of your starter.
Cloth: Used to cover the jar, allowing the starter to breathe while keeping out debris.
Rubber band: Secures the cloth over the jar to keep it in place.
Measuring cup: Ensures accurate measurement of flour and water.
Mixing spoon: Used to stir the flour and water mixture thoroughly.
Kitchen scale: Optional but useful for precise measurements, especially if you prefer weight over volume.
Scraper: Helps in discarding half of the starter cleanly without making a mess.
How to Save Time on Making This Recipe
Use warm water: Warm water speeds up the fermentation process, making your starter active more quickly.
Smaller feedings: Instead of discarding half, use smaller amounts of flour and water to feed your starter daily.
Keep it warm: Place your starter in a warm spot in your kitchen to accelerate the fermentation.
Use a clear jar: A clear jar helps you monitor the bubbles and activity level without opening it frequently.
Stir frequently: Stirring your starter a couple of times a day can help distribute the natural yeasts and bacteria evenly.
No Commercial Yeast Starter Recipe
Ingredients
Starter Ingredients
- 1 cup Whole Wheat Flour
- 1 cup Water Room temperature
Instructions
- Day 1: Mix 1 cup of whole wheat flour and 1 cup of water in a glass jar. Cover with a cloth and secure with a rubber band. Let it sit at room temperature.
- Day 2-5: Each day, discard half of the starter and feed it with 1 cup of flour and 1 cup of water. Stir well, cover, and let it sit at room temperature.
- By day 5, the starter should be bubbly and have a tangy smell. It's ready to use.
Keywords
More Amazing Recipes to Try 🙂
- Cardamom Currant and Cashew Bread Recipe1 Hours
- Chocolate Chip Bread Recipe1 Hours
- Sunflower Almond Wheat Bread Recipe55 Minutes
- Caraway Rye Bread Recipe50 Minutes
- Golden Crescent Rolls Recipe35 Minutes
- Lassy Bread Recipe50 Minutes
- Cinnamon Swirl Chocolate Chip Bread Recipe1 Hours 5 Minutes
- Bread Machine Bagels Recipe35 Minutes
Leave a Reply